Showing posts sorted by date for query about. Sort by relevance Show all posts

Thursday, June 16, 2016

A Pair of Love Seats


I recently purchased a pair of antique/vintage love seats. They are in great shape and I love the boxy Sheraton-like lines. 

I thought it would be a good idea to have a pair of love seats because both the front two parlors have limited space in front of the fireplaces. I'm not sure which room they'll go in quite yet, but I hope to re-upholster them in a wonderful fabric. I'm thinking a fabric that has a period look but that is also quite bold, like a toile or a damask. 

The existing fabric is in good condition, so there is an option to just slipcover them. But I've learned that the price is about the same for either option. Perhaps I'll re-upholster and then over time, have a slipcover made to use seasonally. I've always loved the idea of having something red to put on a sofa during the Christmas and winter season. 


Friday, June 3, 2016

A Story about Floors


Our approach to finish the floors has had many twists and turns since we purchased our home. From what they were (almost entirely painted throughout the house), to what we thought we wanted (stained), to what we have decided to do in the end (seal with a clear water-based matte sealer), the floors have involved quite the journey of discovery. 

The room shown above had not been painted but for some reason, but did have different flooring (probably Douglas fir) from the rest of the house. We had some extra boards left over from the kitchen so we ended up replacing those narrow boards (we are perhaps cursed with thoroughness) to match the wide white pine boards in the rest of the house. 


These are the new white pine floors with the stain we thought we'd use to 'age' the newly sanded wood. Thankfully, we only did this room and the hallway before we realized that it wasn't what we were quite looking for after all. 

Mike just sanded off that stain over the weekend, getting ready to seal them with a clear matte sealer.

The bathroom, as it was when we purchased our home, had several layers of flooring covering the old boards. All of those boards had to be removed to update the plumbing and electrical, some needed to be replaced entirely due to rot. 


Here are the floors today, nearly ready to be sealed. And I have to say 'hello' to our mystery window, for those who remember that post (and here).  


From that same bathroom, looking down the hallway, you can see the old brown painted floors. 


And here's the hallway today - closet doors have been removed. 


Here is that same hallway, looking now towards the bathroom, with the stain sample we tried (and did not like). 


Here it is with the stain removed, ready to be sealed by the clear matte sealer. 

Our move-in date is soon. There will still be much to do, but we can at least say that all the dirty work is behind us. 

Friday, April 29, 2016

A Fresh Coat of Paint


BEFORE

A fresh coat of paint...I believe those were our words when we discussed what the house needed most after our first walk through. It was indeed a true statement but it did not perhaps acknowledge the great deal of work to do before that paint brush could be picked up. 

Those things included repairing walls, fireplaces, installing crown molding, fixing heating vents, lead paint removal, updating electric, updating plumbing, etc. 

So it is with a great sense of accomplishment that we are at the last phases of our renovation - the finishes. 

AFTER 

Early on, we started meeting with a local house historian in regards to our renovation. She is especially known for her ability with helping choose appropriate paint colors for period homes. 

Upon our first meeting, I handed her about a half dozen neutral paint chips I had narrowed our decision down to. Without hesitation, she pointed to the paint swatch Cyprus Springs by ECOS paints. She explained that it had both warm and cool properties. 

I think the white will become even warmer when the ram board is taken up and the historic white pine floors are exposed. I also look forward to hanging artwork for I have always loved the combination of antique gilt against a warm white. 

Also, we used this one color on everything - including the ceilings. The only variation is sheen. 

BEFORE

AFTER 

BEFORE 

AFTER 

Notice here that the outlet was moved. It had been oddly placed to the left of the window and I preferred (to the dismay of our electrician and to Mike) it to be under the window so it will be out of sight when a table is there. 

The number one reason I wanted to keep the outlet on that wall as opposed to placing it elsewhere in the hall (code required one outlet in that space) is Christmas. I look forward to placing a small Christmas tree with white lights in that window during Christmas time. 

BEFORE 

AFTER 

I do aspire to play with more color on the walls (not the trim), especially downstairs where the walls are half the size due to the paneling. But this will happen over time as we select textiles and furnishings. 

As of this very moment, Mike has only one room left to paint - the downstairs library/office. When he is finished, he will have painted a great deal of moldings and walls. 

Next...sealing the floors. 

Friday, March 18, 2016

The Little Things


When I say the little things, I don't mean it is the little things that make up the larger good (although they do and this does). What I mean is that it's the little things that need constant attending to. In this case, righting a misplaced light switch by an electrician we used early on (pardon the blurry iPhone photo Mike sent me). 

As you can see, it was oddly placed far from the doorway trim. 

Mike has been working with our new electrician for several days now figuring out the wiring of the house. There have been a vast array of upgrades (grounding outlets, updating panels) but also, a great deal of removing miscellaneous un-used wires.  Apparently, those can add up after nearly 200 years. 

But this post is really about something else...

Mike is taking off the rest of March TO WORK ON THE HOUSE! 

This is in hopes to move into the house before the lilacs blossom.

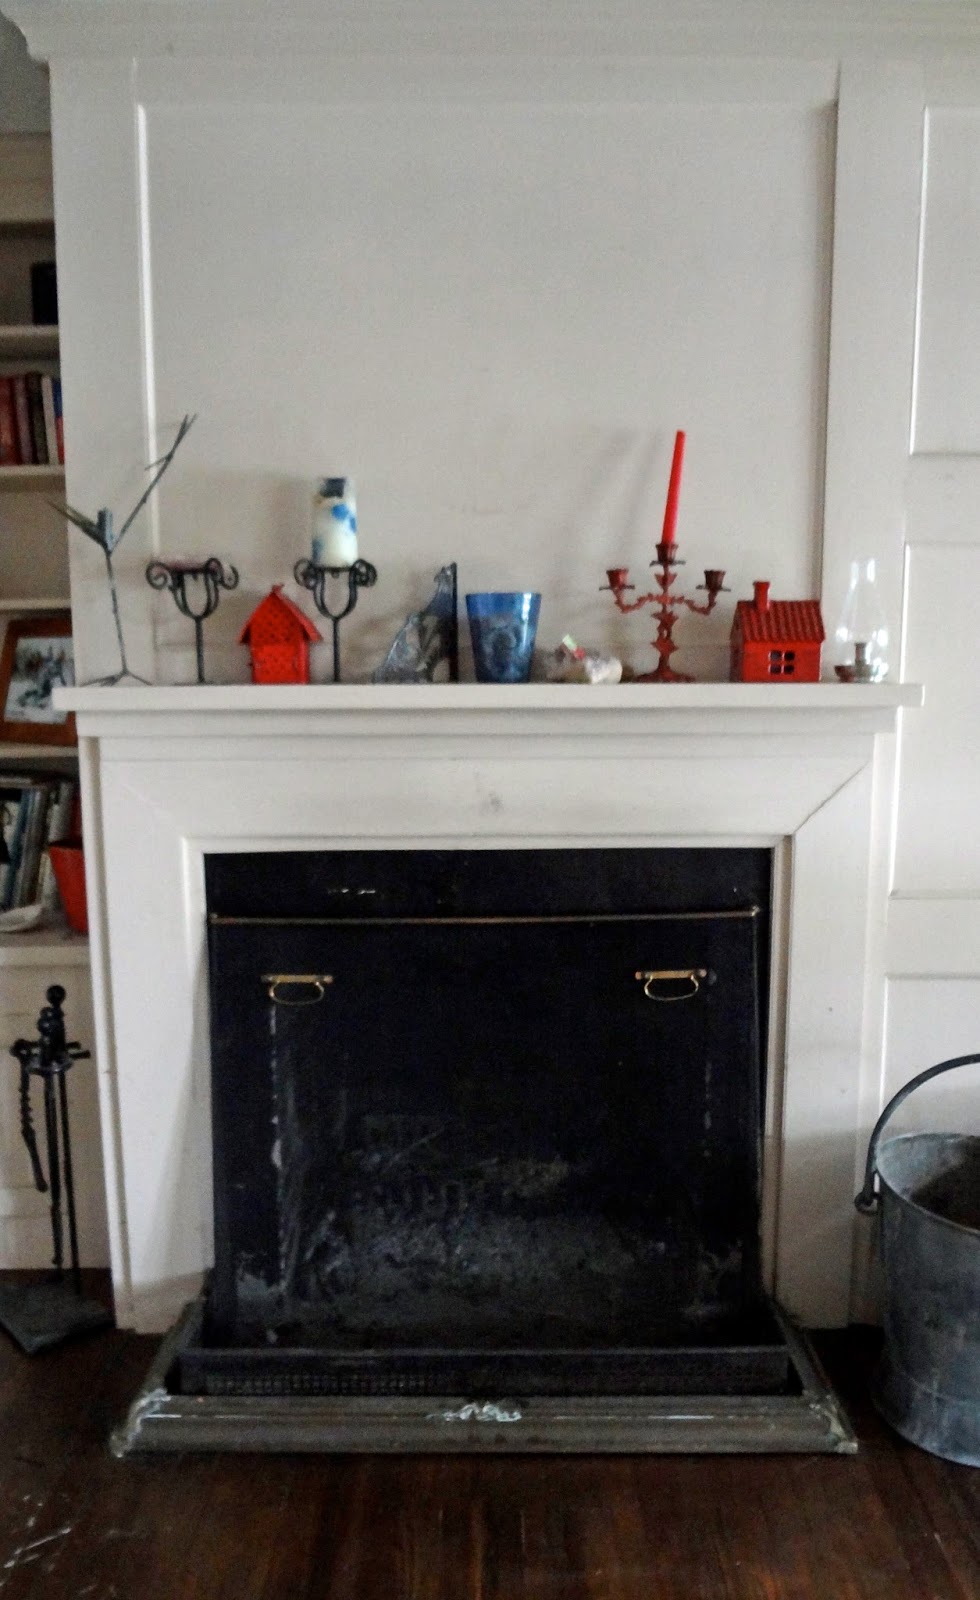
I am very hopeful and often dream of hanging the first mirror over the mantle. 

Sunday, February 21, 2016

Planing Old Salvage Boards


Mike recently stopped in at our local historical salvage yard and picked up some 200 year old white pine boards for a few floor repairs in the main house. They had been subfloor or sheathing boards in their previous life, so were rough finished. And as such, they are not as uniformly high quality as original floor boards.

Jack Crane, the craftsman who built our front entry and our new (old) windows invited Mike to his workshop to run the boards through the planer (as he was getting ready to change his cutters in the planer and so was not worried about damage). The result is quite dramatic. 

Here is a side by side comparison before and after planing. Some of the boards turned out in better shape than others, but we'll be able to piece together the repairs with the aged wood. This will be our best chance at reasonably matching the similarly aged boards that are in the house already.

Now the replacement boards are ready to be installed. 


Thursday, February 18, 2016

Refined Mantel


BEFORE 

This photograph shows the family room mantle before we purchased the house, when renters were still living there. 

The mantle had a boxy, unrefined look about it. After they refined the mantles upstairs in the main house, we thought we'd ask Nate and Darryn for their help in making similar upgrades to this one (which is located in the el of the house). 

Once again, they created something quite extraordinary! 


AFTER 

The result is a much more refined and historical mantle, and I love it so much. 

It is so beautiful - thank you Darryn and Nate! 


Monday, February 1, 2016

Car Seat Covers


Once again, we have ordered custom organic car seat covers for our new car seats. I cannot say enough good things about Kate at Sassy Stork! She is wonderful to work with and I am just enormously grateful that she provides such a wonderful service. 


Saturday, January 16, 2016

Flax Walnut and Date Muffins


We are still enjoying the Flax Date Walnut muffins I posted about one year ago. I make them every week to have on hand for breakfast, snacks or for an after dinner dessert. 

The recipe has evolved over the year as I have figured out what my children love best about them. So here is my updated recipe: 

One large banana
A handful of walnuts (about a cup)
Two containers unsweetened applesauce (total of 8 ounces)
6-7 Medjool dates, pitted
Two eggs 

I blend the above ingredients in my Cuisinart, starting with the banana, walnuts, applesauce, dates and ending with the eggs. 

Also, the dates can be somewhat firm so I will pit them and let them sit in a bowl of hot water to soften them up before adding to the Cuisinart mixture. 

In a large mixing bowl, I combine the following dry ingredients:

1 1/2 cups unbleached flour 
1/2 teaspoon salt
1/2 teaspoon baking soda
1/2 teaspoon baking powder 
1 cup freshly ground whole flax seed (I use a coffee grinder for this sole purpose)

Combine wet and dry ingredients and spoon into one dozen lined muffin tins. 
Bake at 350 degrees for about 15-20 minutes or until toothpick comes out clean. 

We serve them with butter, 100% all fruit jam or enjoy them plain. 

I love mine with a cup of green tea. 

What I love about these muffins is that they are so delicious and taste very much like a treat but have no added sugar (especially processed). They are simply sweetened by fruit. 

Also, with one cup of walnuts and one cup of flaxseed, these muffins are quite nutrient dense. 

Snowing here...it's going to be a good baking day! 


Monday, December 21, 2015

The Re-Making of a Side Entry


This is the side entry as it was when we purchased our house, an enclosure built most likely in the 1950s or 1960s. This space was actually built out from the exterior wall of the original el. To the left is the exterior wall of a cape that was brought to the site and added to the original el. The different widths of the original el and the relocated cape created an alcove that was enclosed as shown above. We decided to open the space back up to create a more inviting, focal side entry.


Here is the entry after peeling away the exterior wall and windows.


We replaced the peeling boards on the entry ceiling with a more classic wainscot pattern than was there previously.


We also replaced the flooring as there was water damage along the front wall of the former enclosure. Here are Nate and Darryn installing tongue and groove fir floor boards (color is Benjamin Moore, Platinum Gray).


Here Nate works on the beam that supports the porch roof. Also notice that the double-hung window has an 8 light sash over a 12 light sash.


Installing the 12-inch wide tongue and groove wall boards. We opted to 'weather board' the porch instead of clapboard, which is a customary treatment for exterior spaces such as this on historic homes.


Here are Nate and Darryn sizing up finishing the support beam. Of course, none of the walls nor roof framing were plumb, level or square, so as with many of our retrofits there were judgements to be made on how to best align the restored elements.


As an aside, we decided to flip the 8 over 12 windows in the house so that the larger sash is on top to realign with the more elegant configuration that prevails in our region. This happened to be the first window we reconfigured, and here the 12 light sash is reinstalled on top. In doing so, we actually found a paint line on the jamb that confirmed this was a 12 over 8 window previously.

We will have to do some touch up painting on the flipped window sash. I will post on the process of flipping the windows next.


The short early December days mean finishing up after dusk.


Here Nate is finishing the fascia at the front of the floor framing.


And here is the porch as of this weekend.

Left to do:

Replace single-paned french interior door with solid six-panel Federal door
Install porch light
Finish touch-up painting
Come spring, create new path that leads from driveway to porch

And as the photos may convey, we are not going to be moving into the house before Christmas.
This realization came about a month ago.

But as of last week, the main house has heat! The new boiler was installed and propane line (dug by Mike) run. That was a big step to set up the last finishing steps on the interior (turning water on, painting, floors, etc.)
I have been having spacing issues with Blogger for some time now - apologizes for any issues on your end! 
 

Friday, November 6, 2015

The Beautiful Monarch


After reading a great deal about the extraordinary Monarch butterfly, we decided to enlist in Monarch Watch’s proliferation efforts and rear some ourselves. The caterpillars arrived in small containers. Immediately after arrival, they need to be fed fresh milkweed and set up in their rearing container. 

We purchased a 10 gallon aquarium at our local hardware store to rear them in. The paper towels needed to be replaced and freshly washed milkweed needed to be supplied every day.

The biggest risk to the caterpillars is always disease. So the container had to be kept clean and any seemingly sick caterpillars had to be quarantined in separate spaces to prevent infection of the rest of the caterpillars. 

You can see how small they are when they arrive. The tiny caterpillar is at the very tip of the milkweed leaf. 


We set up our rearing station in the front room, away from too much noise and direct sunlight. 


It wasn't long before our tiny caterpillars started to grow.


It really makes the heart sing to watch the whole process. 

It also breaks your heart when some don't survive or are not well. That is what happened a day after I took this photo. I woke up to sluggish, under the weather caterpillars. 

My first fear was disease (specifically Black Death) as it is so easy to pass on bacteria and viruses when they share the same space. 


The morning they seemed under the weather, we rushed to our local thrift store and bought individual containers for each of them, in case it was an illness. All the containers were washed and dried and filled with fresh milkweed. 

I was in such a state of heart break that I had to have Mike take over for a day or two as I couldn't bear to see them not doing well. Thankfully, day by day, they recovered which led me to believe that turning on the heat in the house dehydrated them. 


And so they sat happily in the window... Recovering and growing. 


They are hungry little caterpillars so an abundant supply of fresh milkweed is always in order. 


Then one day, one by one (at different times throughout the week), each caterpillar crawled up to the top of their jars...


...and formed the classic J to prepare for their chrysalis stage. 


The color variations throughout their amazing life cycle is quite astounding. They go from black and yellow stripes to completely green. 


Then after several days, the green chrysalis turns black and becomes transparent so much so that one can begin to see the beautiful monarch colors shining through. You can even see the butterfly moving inside. 


Then the beautiful Monarch emerges and her miraculous transformation is complete. 


We were quite proud of our Monarch Butterflies. We became very attached to them and of course with that, came a great deal of worry...About their lengthy migration ahead (to Mexico or areas of Southern California), about the weather, the temperatures, etc. Due to our New England location, we ended up driving our butterflies about two hours south to where the temperatures were at least five degrees warmer. Luckily, the forecast called for 70 degree temperatures and no precipitation for the following week. 


Fair thee well my friend....

I cannot end this post without a little story about milkweed. 

We were lucky to have several milkweed plants in our flower beds here at the rental house. But as the nights grew cooler, the milkweed deteriorated. One of my fears as to why the caterpillars became ill was that the milkweed we had was of poor quality. 

I was literally in a state of desperation that morning I awoke to find our caterpillars under the weather. I was a sobbing mess actually and wanted desperately to figure out a way in which to revive them. Unfortunately, I could not find any more milkweed on our property (we had used it all up) but while looking out our dining room window with Mike, I could see a milkweed plant at the neighbor's house across the street. Neighbors who are very nice but who we don't know very well. 

Without delay, I left Mike at the window and ran across the street (in my pajamas) and picked the most beautiful milkweed I had seen so far. Our neighbors are a young family with small children and the mom is a schoolteacher so I assumed that no one was at home. 

When I came back inside, beaming with my handful of Amazon quality milkweed, Mike asks, "Did you see the neighbor? Did you ask if it was okay to pick their milkweed?" 

"No,  they're all at school, no one is home." 

He looks at me curiously and says, "Um, it's Saturday." 

Then he adds, "Don't worry, I'm sure your outfit camouflaged you." 

Horrified, I can barely ask, "Did they see me ransacking their flower beds? We're they watching me through the window?" 

To that he replied, "I don't know, I turned away, I couldn't look." 

As the image of me (in my pajamas) raiding our neighbors flower bed as they looked on sunk in, I hesitantly asked, "Should I call them and explain?" 

"To explain that you only picked their milkweed because you thought they weren't home?" 

We healed my embarrassment with laughter at the whole thing and have no regrets because I do believe that that wonderfully lush milkweed revived our dear caterpillars! 

And no, I have yet to confess or explain myself to the neighbors. 

Related Posts Plugin for WordPress, Blogger...